Spring Pastel Nail Designs and Easter Nails
As Easter Day approaches, I feel it marks the confirmation that Spring has finally arrived, and with Spring weather, cheerful soft pastel colors make their return. In an instant, nail polish choices flip from winter darks to spring lights, or more accurately, to pastels and brights. We have an inescapable desire to revel in the long awaited change of season by donning shades that are symbolic of Spring. Without any knowledge of the history of these colors, people are instinctively drawn to pastels for Spring and Easter.
I find it remarkable that pastels were once unpopular among artists and regarded as the sole province of amateurs, but their popularity has waxed and waned throughout their history. During a high point of pastel appreciation, they were so de rigueur that a "Pastel Society" was created to increase awareness and appreciation of the medium. Most of the “pretty” colors that we associate with Easter are richly symbolic hues that had been chosen by the church to embody the essence of the Easter holiday. Over the years, traditional liturgical colors have merged with the naturally bright colors of the spring season to make Easter one of the peppiest, most cheerful holidays for colors.
First becoming popular in 18th century France, pastels in the early 21st century were considered pre-teen colors and were primarily used in toy marketing and clothing for young girls. Today, pastels are still used for marketing women’s products, however, they are increasingly being used in both male and unisex marketing campaigns. Pastel colors are associated with a range of emotions and symbolism such as love, affection, joy, romance, calmness, peace, and satisfaction. These delicate colors are pretty and sweet, and because of this, they are often used in ice cream shops, bakeries, baby products, and even perfume. Pastel colors lighten and balance bolder and darker color schemes, making them feel more soothing and less imposing - ideal for the limited space of a nail bed! We have created a list of some of these pastel colors used in nail art that have influenced many different aesthetics and art movements.
Pastel Easter Nail Designs
Team JINsoon has created nail art inspired by pastel colors and Easter.
Curvy Pastel

French got carried away in the joy of the season with this curvy pastel design that is an artsy extension of the French manicure
How-To Steps:
- Clean, prep nails and shape nails using a JINsoon High Performance Diamond Nail File to models’ desired shape.
- Apply a coat of JINsoon Muse as a base coat.
- Draw wavy lines from the top right side of the nail and connect with the French line at the bottom using Peace, Ube, Birdie, Tweety, and Keppel.
- Apply Top Gloss for a shiny finish.
- JINsoon High Performance Diamond Nail File, Power Coat, Love, Aero, Tweety, Winky, and Top Gloss
Painted Egg Colors

Garnish Easter eggs with black and white Easter motifs
- Clean, prep, and shape nails using a JINsoon High Performance Diamond Nail File to the desired shape.
- Apply Power Coat base coat to each nail.
- Apply two coats of Dolly Pink, Aero, Tweety, Birdie and Keppel on each nail.
- Draw two zigzag lines with a striping brush using Tweety on the ring finger.
- Dab Dotty on Birdie on your index finger.
- Finish with Matte Maker matte top coat for a satin matte finish or Top. Gloss top coat for a gloss finish.
- JINsoon High Performance Diamond Nail File, Power Coat, Dolly Pink, Aero, Tweety, Birdie, Keppel, Dotty, Matte Maker matte top coat and Top Gloss.
MINI POM-POM

From soft pastels to bold brights! Make your nails look as beautiful as Spring flowers with mini pompoms on your nails!
- Clean, prep nails and shape nails using a JINsoon High Performance Diamond Nail File to models’ desired shape.
- Apply Power Coat base coat to each nail.
- Apply JINsoon Love on a makeup sponge, dabbing it anywhere you want.
- Do the same with Aero, Tweety, and Winky.
- Apply JINsoon Matte Make matte Top Coat for a satin finish or Top Gloss for a shiny finish.
- JINsoon High Performance Diamond Nail File, Power Coat, Love, Aero, Tweety, Winky, and Top Gloss.
Toppings on Pastels

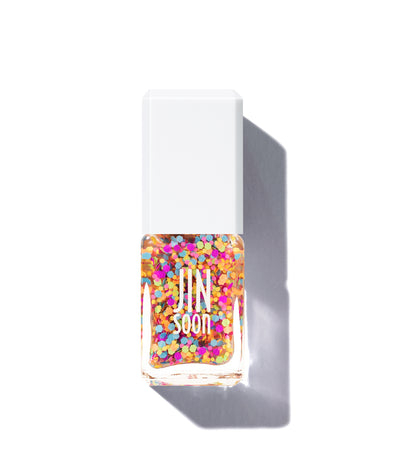
The miniature square confetti contrasts beautifully with the pastel base for an eye-catching nail design
How-To Steps:
- Clean, prep nails and shape nails using a JINsoon High Performance Diamond Nail File to models’ desired shape.
- Apply Power Coat base coat to each nail.
- Apply two coats of JINsoon Peace, Ube, Keppel, Birdie and Tweety on each nail.
- Dab Motif, black and white square toppings over pastel colors.
- Apply JINsoon Top Gloss for a shiny finish.
- JINsoon High Performance Diamond Nail File, Power Coat, Peace, Ube, Keppel, Birdie and Tweety, Motif and Top Gloss
Wavy Block French

The exaggerated thickness of the French line reads like a double entendre
How-To Steps:
- Clean, prep and shape nails using a JINsoon High Performance Diamond Nail File to the models’ desired shape.
- Apply Power coat base coat to each nail.
- Apply a coat of Muse.
- Draw different shapes of wavy blocks with Birdie, Aero, Love, Ube and Peace using the brush from the polish.
- Apply JINsoon Top Gloss for a shiny finish.
- JINsoon High Performance Diamond Nail File, Power Coat, Muse, Birde, Aero, Love, Ube and Peace and Top Gloss.
Double Wavy

- Clean, prep and shape nails using a JINsoon High Performance Diamond Nail File to the models’ desired shape.
- Apply Power coat base coat to each nail.
- Apply a coat of Muse.
- Draw different shapes of wavy blocks with Birdie, Aero, Love, Ube and Peace using the brush from the polish.
- Draw different shapes of wavy blocks with Nifty right below the first wavy blocks.
- Apply JINsoon Top Gloss for a shiny finish.
- JINsoon High Performance Diamond Nail File, Power Coat, Muse, Birde, Aero, Love, Ube and Peace, Nifty and Top Gloss.
Pastel Geometrics

Simple geometric shapes on pop yellow is a great way to grab attention. Try this eye-catching vibrant graphic on your nails.
How-To Steps:
- Clean, prep, and shape nails using a JINsoon High Performance Diamond Nail File to the desired shape.
- Apply Power Coat base coat to each nail.
- Apply two coats of Tweety on each nail.
- Draw different geometric shapes on each nail with Winky.
- Dab Dotty on Birdie on index finger.
- Finish with Top Gloss top coat.
- JINsoon High Performance Diamond Nail File, Power Coat, Tweety, Winky and Top Gloss.
Striking Pastels

Give your nails identity with these crisp and dramatic pastels. Using a different pastel on each finger is like art itself.
- Clean, prep, and shape nails using a JINsoon High Performance Diamond Nail File to the desired shape.
- Apply Power Coat base coat to each nail.
- Apply two coats of Pinky to index and the middle finger nail, Winky on the ring finger nail and Tweety on the baby nail.
- Finish with Top Gloss top coat.
- JINsoon High Performance Diamond Nail File, Power Coat, Tweety, Winky and Top Gloss
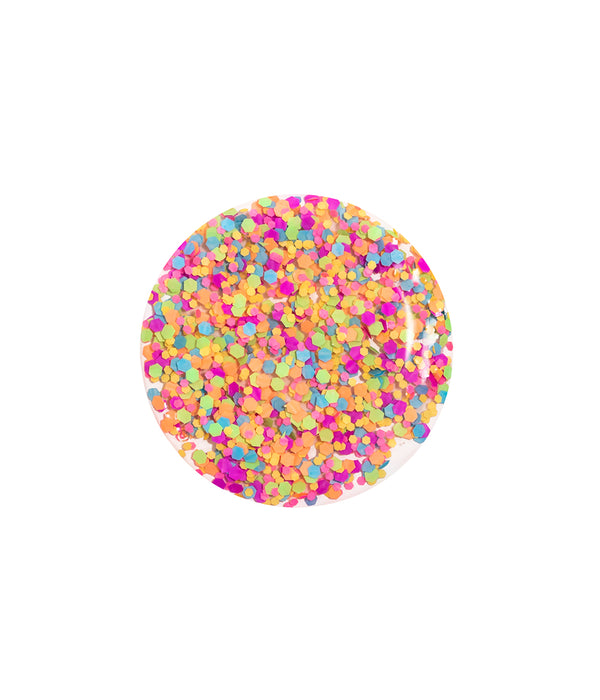
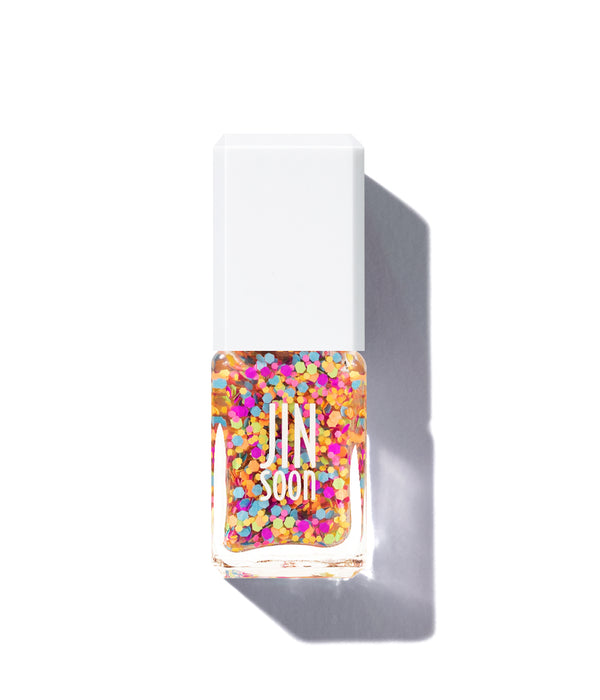
Fun-fetti

Decorate your nails with this colorful fun-fetti festival
- Clean, prep, and shape nails using a JINsoon High Performance Diamond Nail File to the desired shape.
- Apply Power Coat base coat to each nail.
- Apply two coats of Tweety on each nail.
- Dab Dotty on each nail.
- Finish with Top Gloss top coat.
Color Block

Be super modern and simple with this vertical color block design on two accent nails.
- JINsoon High Performance Diamond Nail File, Power Coat, Pinky, Winky and Top Gloss.
No Dot About It

If you doubt your artistic ability, just apply Dotty on your nails over a clean base for instant nail art!
How-To Steps:
- Clean, prep, and shape nails using a JINsoon High Performance Diamond Nail File to the desired shape.
- Apply Power Coat base coat to each nail.
- Dab Dotty on each nail.
- Finish with Top Gloss top coat.
- JINsoon High Performance Diamond Nail File, Power Coat, Dotty and Top Gloss.
Abstract V

This artistic, abstract and modern design on accent nails is like a painting, but easier to do.
- Clean, prep, and shape nails using a JINsoon High Performance Diamond Nail File to the desired shape.
- Apply Power Coat base coat to each nail.
- Apply two coats of Pinky.
- Draw a triangle-like shape with Winky on the left side of the index and middle finger nails, and a swooping line on the right side with Beau, by overlapping them for an abstract V.
- Finish with Top Gloss top coat.
- JINsoon High Performance Diamond Nail File, Power Coat, Pinky, Winky, Beau and Top Gloss.
When Puddle meets Fun-fetti

Colorful puddles interlaced with fun-fetti for a unique, playful design.
- Clean, prep, and shape nails using a JINsoon High Performance Diamond Nail File to the desired shape.
- Apply Power Coat base coat to each nail.
- Dab Dotty on each nail.
- Draw different sizes of puddles on each nail on top of fun-fetti.
- Finish with Top Gloss top coat.
- JINsoon High Performance Diamond Nail File, Power Coat, Dotty, Winky and Top Gloss.
All About U

Elegant nail art that is all about you. This design works best with two pleasantly-contrasting shades
How-To Steps:
- Clean, prep, and shape nails using a JINsoon High Performance Diamond Nail File to the desired shape.
- Apply Power Coat base coat to each nail.
- Apply two coats of Winky.
- Draw a U shape with Tweety and Pinky by alternating with a striping brush.
- Finish with Top Gloss top coat.
- JINsoon High Performance Diamond Nail File, Power Coat, Winky, Tweety, Pinky and Top Gloss.
Dot Geometric

These cute nails are perfect for a young vibe but they will still be taken seriously
- Clean, prep, and shape nails using a JINsoon High Performance Diamond Nail File to the desired shape.
- Apply Power Coat base coat to each nail.
- Apply two coats of Pinky on each nail.
- Draw a triangle like angle from left to right on the middle and the ring finger nails with Winky.
- Dab Dotty at the above triangle.
- Finish with Top Gloss top coat.
- JINsoon High Performance Diamond Nail File, Power Coat, Pinky, Dotty, Winky and Top Gloss.
Mellow Yellow

Suave mellow yellow is perfect for your Easter nails
- Clean, prep, and shape nails using a JINsoon High Performance Diamond Nail File to the desired shape.
- Apply Power Coat base coat to each nail
- Apply two coats of Tweety on each nail
- Finish with Top Gloss top coat
- JINsoon High Performance Diamond Nail File, Power Coat, Tweety and Top Gloss.
Dotty Accent

One finger does the trick!
- Clean, prep, and shape nails using a JINsoon High Performance Diamond Nail File to the desired shape.
- Apply Power Coat base coat to each nail.
- Apply two coats of Pinky on each nail.
- Dab Dotty on any nail you want.
- Finish with Top Gloss top coat.
- JINsoon High Performance Diamond Nail File, Power Coat, Pinky, Dotty and Top Gloss
Hot dots

One for and all for one! Simply top off some or all of your nails
How-To Steps:
- Clean, prep, and shape nails using a JINsoon High Performance Diamond Nail File to the desired shape.
- Apply Power Coat base coat to each nail.
- Apply two coats of Winky on each nail.
- Dab Dotty on any nail you want or on full nails.
- Finish with Top Gloss top coat.
- JINsoon High Performance Diamond Nail File, Power Coat, Winky, Dotty and Top Gloss.
Cracked Eggshells

You don't have to crack an egg to get this design - just select a contrasting color for the painted-on cracks
- Clean, prep, and shape nails using a JINsoon High Performance Diamond Nail File to the desired shape.
- Apply Power Coat base coat to each nail.
- Apply two coats of Kookie White on each nail.
- Draw small lines of geometric shape to mimic a cracked egg with Tila, Hella, Aero and Charme on each nail from the index using a strping brush.
- Finish with Top Gloss top coat.
- JINsoon High Performance Diamond Nail File, Power Coat, Kookie White, Tila, Hella, Aero and Charme and Top Gloss
Easter Egg

Paint your nails as though they are painted Easter eggs
- Clean, prep, and shape nails using a JINsoon High Performance Diamond Nail File to the desired shape.
- Apply Power Coat base coat to each nail.
- Apply two coats of Doux on each nail.
- Draw upside down lips from the cuticle line and the same line right under and reverse the design from the tips with JINsoon Hella using a strping brush.
- Finish with Top Gloss top coat.
- JINsoon High Performance Diamond Nail File, Power Coat, Doux, Hella and Top Gloss.
Rose Gold Lines

Cross hatched gold will define the color field blocks for an imperial look
- Clean, prep, and shape nails using a JINsoon High Performance Diamond Nail File to the desired shape.
- Apply Power Coat base coat to each nail.
- Apply two coats of Peace on each nail.
- Draw vertical color blocks and thick cross lines with Dolly Pink, then draw lines by both sides of the Dolly Pink with Spiffy.
- Finish with Top Gloss top coat.
- JINsoon High Performance Diamond Nail File, Power Coat, Peace, Dolly Pink, Spiffy and Top Gloss.
Multi Pastel Combo

Mix and match your favorite pastels, but stick to only one color per finger
- Clean, prep, and shape nails using a JINsoon High Performance Diamond Nail File to the desired shape.
- Apply Power Coat base coat to each nail.
- Apply two coats of Ube, Aero, Sinopia and Keppel on any nail you desire.
- Finish with Top Gloss top coat.
- JINsoon High Performance Diamond Nail File, Power Coat, Ube, Aero, Sinopia and Keppel and Top Gloss.
Two Tones in One

Upside down exaggerated French tones using different colors on each finger nail make a bold and beautiful statement
- Clean, prep, and shape nails using a JINsoon High Performance Diamond Nail File to the desired shape.
- Apply Power Coat base coat to each nail
- Apply two colors on each nail in a slightly concave downward form from the cuticle line using a striping brush - Keppel/Ube, Sinopia/Aero, Ube/Keppel and Aero/Sinopia
- Finish with Top Gloss top coat
- JINsoon High Performance Diamond Nail File, Power Coat, Keppel, Ube, Sinopia, Aero and Top Gloss
Multi-tones in One

Four curved nail tones per finger for an interesting segue look
- Clean, prep, and shape nails using a JINsoon High Performance Diamond Nail File to the desired shape.
- Apply Power Coat base coat to each nail.
- Apply four colors on each nail in a slightly concave downward form from the cuticle line using a striping brush – use Keppel, Ube, Sinopia, Aero on one nail and the thickness can vary per color.
- Finish with Top Gloss top coat.
- JINsoon High Performance Diamond Nail File, Power Coat, Keppel, Ube, Sinopia, Aero and Top Gloss.
Sharp Vertical Slant

Eccentric wedges of color at the side of your nails are sure to draw attention
- Clean, prep, and shape nails using a JINsoon High Performance Diamond Nail File to the desired shape.
- Apply Power Coat base coat to each nail.
- Apply two coats of Ube on each nail.
- Draw a vertical triangle angle from top left to bottom in an angle with Sinopia using a striping brush.
- Finish with Top Gloss top coat.
- JINsoon High Performance Diamond Nail File, Power Coat, Pinky, Dotty, Winky and Top Gloss.
Puzzle Piece

Find the missing puzzle piece on your nails
- Clean, prep, and shape nails using a JINsoon High Performance Diamond Nail File to the desired shape.
- Apply Power Coat base coat to each nail.
- Apply two coats of Ube on each nail.
- Draw a triangle like angle from left to right with Aero.
- Draw an upside down trapeze shape on top of the angle with a striping brush.
- Finish with Top Gloss top coat.
- JINsoon High Performance Diamond Nail File, Power Coat, Ube, Aero and Top Gloss.
Pastel Green
 One color does it all to celebrate Easter
- Clean, prep, and shape nails using a JINsoon High Performance Diamond Nail File to the desired shape.
- Apply Power Coat base coat to each nail.
- Apply two coats of Keppel on each nail.
- Finish with Top Gloss top coat.
- JINsoon High Performance Diamond Nail File, Power Coat, Keppel and Top Gloss.
Colorful Camouflage

Be careful - you'll be discovered with this nail design
- Clean, prep, and shape nails using a JINsoon High Performance Diamond Nail File to the desired shape.
- Apply Power Coat base coat to each nail.
- Apply two coats of Keppel on each nail.
- Blub Aero here and there and Sinopia after - overlapping will make a better camouflage.
- Finish with Top Gloss top coat.
- JINsoon High Performance Diamond Nail File, Power Coat, Keppel, Aero, Sinopia and Top Gloss.
Soft Lilac

Make a statement with this quintessential symbol of Spring
- Clean, prep, and shape nails using a JINsoon High Performance Diamond Nail File to the desired shape.
- Apply Power Coat base coat to each nail.
- Apply two coats of Ube on each nail.
- Finish with Top Gloss top coat.
- JINsoon High Performance Diamond Nail File, Power Coat, Ube and Top Gloss.
Sky Blue

A happy yet subdued blue to usher in the Spring weather
- Clean, prep, and shape nails using a JINsoon High Performance Diamond Nail File to the desired shape.
- Apply Power Coat base coat to each nail.
- Apply two coats of Aero on each nail.
- Finish with Top Gloss top coat.
- JINsoon High Performance Diamond Nail File, Power Coat, Aero and Top Gloss.
Pollack Touch

Jackson on your nails without the large canvas
- Clean, prep, and shape nails using a JINsoon High Performance Diamond Nail File to the desired shape.
- Apply Power Coat base coat to each nail.
- Apply two coats of Aero on each nail.
- Create the abstract painting with either a sponge or nail polish brush using Sinopia.
- Finish with Top Gloss top coat.
- JINsoon High Performance Diamond Nail File, Power Coat, Aero, Sinopia and Top Gloss.
Negative Space Lines

We're positive you'll like this design
- Clean, prep, and shape nails using a JINsoon High Performance Diamond Nail File to the desired shape.
- Apply Power Coat base coat to each nail.
- Draw uneven imperfect lines with Charme, Enflammee and Tila.
- Finish with Top Gloss top coat.
- JINsoon High Performance Diamond Nail File, Power Coat, Charme, Enflammee , Tila and Top Gloss.
Two Tone Stripes

Thick, imperfect two-tone stripes for an artistic, Spring aesthetic
- Clean, prep, and shape nails using a JINsoon High Performance Diamond Nail File to the desired shape
- Apply Power Coat base coat to each nail.
- Apply a coat of Dew.
- Draw uneven, imperfect thick blocks from the cuticle to the half of nail with Doux and the other half to the end of the nails with Charme, Enflammee and Tila.
- Finish with Top Gloss top coat.
- JINsoon High Performance Diamond Nail File, Power Coat, Dew, Doux Charme, Enflammee, Tila and Top Gloss.
Multi-Tone Irregular Stripes

A marching multi-tone stripe that demands your attention
- Clean, prep, and shape nails using a JINsoon High Performance Diamond Nail File to the desired shape.
- Apply Power Coat base coat to each nail.
- Apply a coat of Dew.
- Draw uneven imperfect thick stripes with five colors in the little section (Doux, Hella, Tila, Charme, and Enflammee) from the cuticle to the end of the nails using a striping brush.
- Finish with Top Gloss top coat.
- JINsoon High Performance Diamond Nail File, Power Coat, Dew, Doux Charme, Enflammee, Hella, Tila and Top Gloss.
Tribal Patterns

Alternating reversed V patterns create a herringbone pattern
- Clean, prep, and shape nails using a JINsoon High Performance Diamond Nail File to the desired shape.
- Apply Power Coat base coat to each nail.
- Apply a coat of Dew.
- Draw uneven imperfect thick blocks from the cuticle to the end of the nails with Charme, Enflammee and Tila.
- Draw tribal patterns with Doux in the thick stripes.
- Finish with Top Gloss top coat.
- JINsoon High Performance Diamond Nail File, Power Coat, Dew, Doux, Charme, Enflammee, Tila and Top Gloss.
Bold Statement

Inspired by Ellsworth Kelly, miniaturized for your nails
How-To Steps:
-
Clean, prep, and shape nails using a JINsoon High Performance Diamond Nail File to the desired shape.
-
Apply Power Coat base coat to each nail.
-
Apply two coats of Charme.
-
Draw tiny curved vertical blocks on the left and intersecting half round shapes on the right with Emflammee using the nail polish brush.
-
Finish with Top Gloss top coat.
Tools and Products Used:
-
JINsoon High Performance Diamond Nail File, Power Coat, Charme, Enflammee and Top Gloss.
Square Block

Paint these "tabs" on the tips of your nails and doors will open for you
How-To Steps:
-
Clean, prep, and shape nails using a JINsoon High Performance Diamond Nail File to the desired shape.
-
Apply Power Coat base coat to each nail.
-
Apply two coats of Doux.
-
Draw square blocks from the tip of nails to 1/3 of nails with Hella.
-
Finish with Top Gloss top coat.
Tools and Products Used:
-
JINsoon High Performance Diamond Nail File, Power Coat, Doux, Hella and Top Gloss.
Angled Lines

No two angles are alike, and that is what make this nail art pop
How-To Steps:
-
Clean, prep, and shape nails using a JINsoon High Performance Diamond Nail File to the desired shape.
-
Apply Power Coat base coat to each nail.
-
Apply two coats of Enflammee.
-
Draw angled lines from the left top corner to the right at the end of the nails with Tila.
-
Draw angled lines from the right top corner to the left at the end of the nails with Tila on the other hand.
-
Finish with Top Gloss top coat.
Tools and Products Used:
-
JINsoon High Performance Diamond Nail File, Power Coat, Enflammee,Tila and Top Gloss.
Pastel Dot

One large dot on each nail as the focal point of your manicure
How-To Steps:
-
Clean, prep, and shape nails using a JINsoon High Performance Diamond Nail File to the desired shape.
-
Apply Power Coat base coat to each nail.
-
Apply two coats of Peace, Hope, Grace, Love on each nail.
-
Apply a dot on each nail right above the tip using a big sized dotting tool with contrasting colors.
-
Finish with Top Gloss top coat.
Tools and Products Used:
-
JINsoon High Performance Diamond Nail File, Power Coat, Peace, Hope, Grace, Love and Top Gloss.
Smile

Egg white is the ideal Easter base color for smiley faces
How-To Steps:
-
Clean, prep, and shape nails using a JINsoon High Performance Diamond Nail File to the desired shape.
-
Apply Power Coat base coat to each nail.
-
Apply two coats of Absolute White on each nail.
-
Apply a smile sticker on each nail.
-
Finish with Top Gloss top coat.
Tools and Products Used:
-
JINsoon High Performance Diamond Nail File, Power Coat, Absolute White, Smile Nail Applique and Top Gloss.